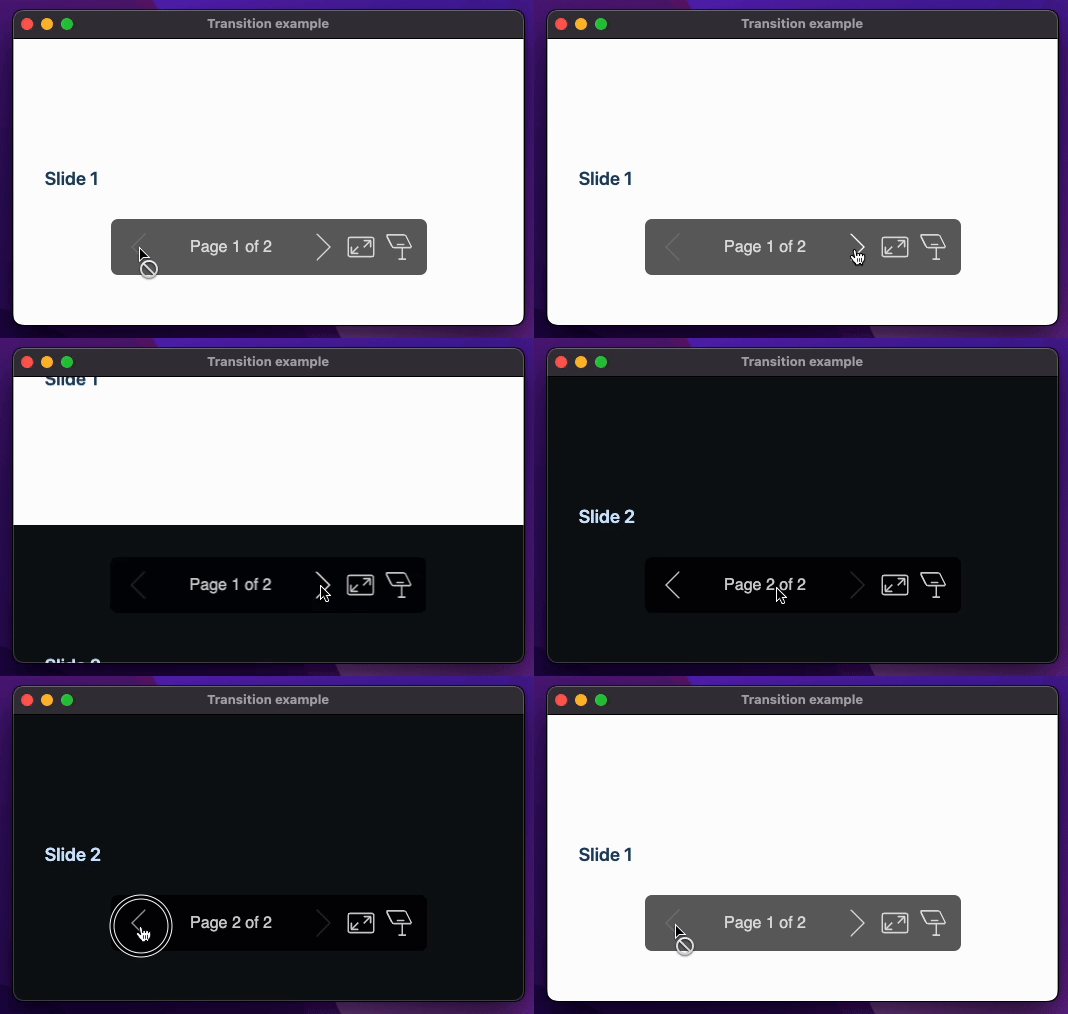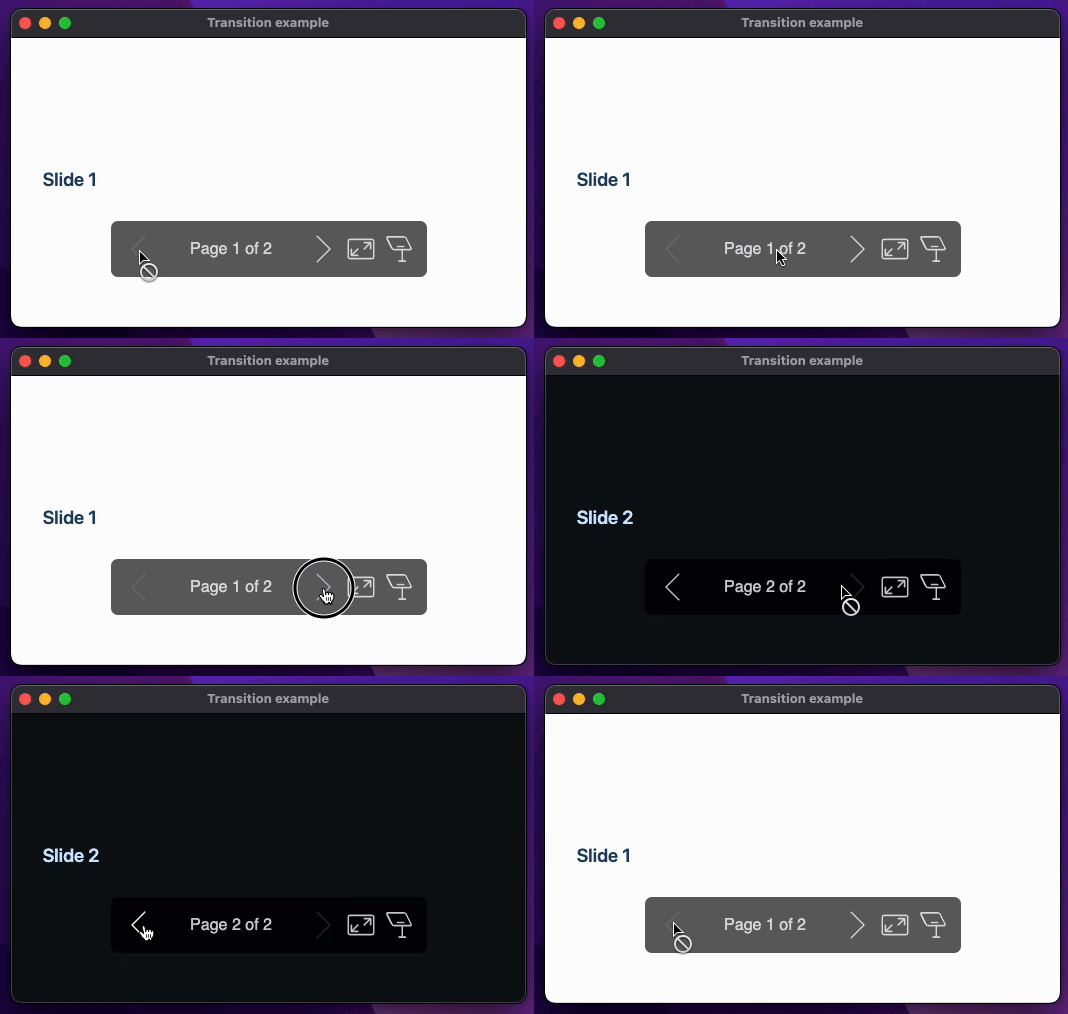
Marp CLI v2 has supported brand-new page transitions for the bespoke HTML template. You can use this stable transition support in either Marp CLI v2.4.0+ or Marp for VS Code v2.5.0+.
Effective transitions will help make a dramatic presentation. Adding a touch of effects to slides is often common in great talks. By viewing HTML slide in the browser that supports View Transitions API (Chrome 110+), or Marp CLI with --preview option, you can start to use varied 33 transition effects out of the box, by just a simple definition transition directive.
Built-in transitions should be useful for 90% of Marp users. But what you can do if there are no effects you are satisfied with? Make your effects in CSS! Marp can register your custom animation set declared in CSS as a named transition, and use it in the Markdown slide.
Index
This article will describe the following things:
- The anatomy of a transition: How the transition effect will work in Marp
- Declare custom transitions: How to register custom transitions by CSS
- Helpful tips for making your transition
See also the official documentation about transitions in Marp CLI.
If using built-in transitions made by us was enough, you don't need to read this article. Please save your time, with keeping enjoying our transitions in your Markdown slide! :)
In this article, the word "transition" is meaning the slide transition effect in Marp. Please note that it is not meaning
transitionproperty in CSS.
The anatomy of a transition
The first what the custom transition author has to know is "How the page transition effect is realized in a presentation slide".
Let's consider what is happening when the slide page was navigated from 1 to 2. If no transitions were set to the slide, the first page will just disappear, and appear on the second page immediately. If it has a transition effect, a certain time for playing animations will insert between switching pages.

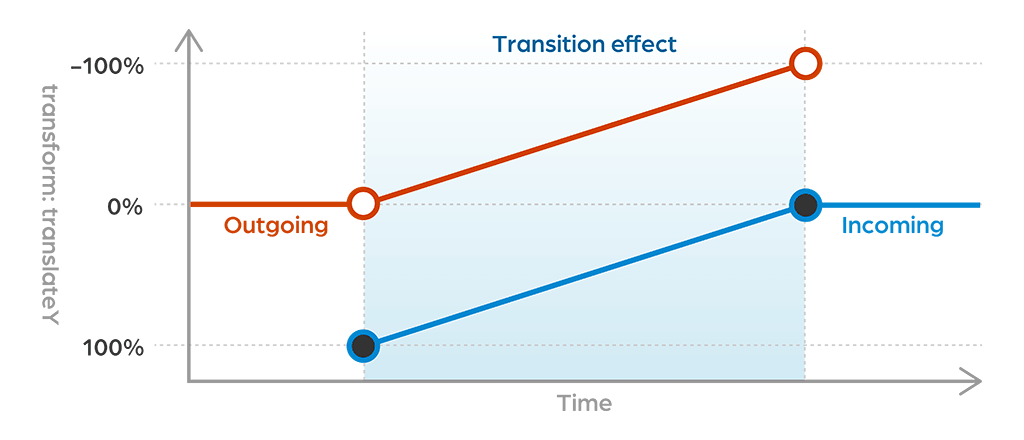
An important thing during transition is that 2 slides are presented in the view at the same time like layers. All kinds of effects produce smooth transitions by applying specific animations to one or both slides.
In Marp, the slide page that was shown before transition calls as "Outgoing slide", and the next page to appear after transition calls as "Incoming slide". Slide pages may have an inverse relationship when brought the backward navigation, but the meaning of "incoming" and "outgoing" is always consistent.
If you could figure them out, you probably also grasp that you have to respect the following 2 principles:
- The outgoing slide should have an animation to hide the slide.
- The incoming slide should have an animation to show the slide.
If either or both was not respected in a transition effect, it would become a weird transition.
Marp CLI's
bespoketemplate will make two slide layers when navigated, and apply suitable animation keyframes declared in CSS.
Declare custom transitions
Simple keyframe declaration
Let's get started with a simple keyframe declaration for the dissolve effect (also known as the cross-fade effect), to learn how to set custom transition animation. Marp uses standard syntax for CSS animation @keyframes to declare transitions.
When applying the dissolve effect to transition principles, you can derive that the effect needs these animations:
- The outgoing slide has an animation to decrease opacity from 100% to 0%.
- The incoming slide has an animation to increase opacity from 0% to 100%.
There are opposite changes with each other. In this case, you can define animations for both slide layers by one @keyframes declaration.
First, declare @keyframes at-rule with the conventional name specified by Marp in your Markdown.
- ---
- transition: dissolve
- style: |
- @keyframes marp-transition-dissolve {
- /* ... */
- }
- ---
- # Slide 1
- ---
- <!-- _class: invert -->
- # Slide 2
marp-transition-xxxxxxxx is the rule of animation name to register the transition with a simple declaration. For using declared transition in Marp slide, assign transition local directive with the name declared in xxxxxxxx.
This example is using
styleglobal directive to declare keyframes. Of course, you also can use the inline<style>element or custom theme CSS to declare.
Well, declare animation details at keyframes. In a simple declaration, you only have to set animation for the outgoing slide. For the incoming slide, Marp will set the animation in the reverse direction automatically.
- @keyframes marp-transition-dissolve {
- from {
- opacity: 1;
- }
- to {
- opacity: 0;
- }
- }
This example has been declared
fromkeyframe for clarity, but you can omit it becauseopacity: 1is a default style.
Did you want more? That's it! Try to test this transition in the HTML slide with the browser that supports View Transitions API, or a preview window in Marp CLI.
- npx @marp-team/marp-cli@^2.4.0 --preview ./transition.md
You have made the first custom transition!
In this article, the example is simplified for teaching how to make a custom transition, and there is a bit of difference from the built-in transition fade for getting the same effect. dissolve effect is looking good, but there is a general pitfall about cross fading.
Split animations into outgoing and incoming
A simple declaration should work in some transition types well, but it's not that all transitions have exactly contrary animations to each other. In reality, different animations for the outgoing slide and incoming slide are required in most cases.
For example, the slide up effect must have these animations:
- The outgoing slide should move from the viewport to the upper outer.
- The incoming slide should move from the lower outer to the viewport.
So you can declare split animations for each layer rather than declaring a single animation. Set @keyframes with the prefix of the target transition: marp-outgoing-transition-xxxxxxxx and marp-incoming-transition-xxxxxxxx.
- ---
- transition: slide-up
- style: |
- @keyframes marp-outgoing-transition-slide-up {
- from { transform: translateY(0%); }
- to { transform: translateY(-100%); }
- }
- @keyframes marp-incoming-transition-slide-up {
- from { transform: translateY(100%); }
- to { transform: translateY(0%); }
- }
- ---
- # Slide 1
- ---
- <!-- _class: invert -->
- # Slide 2
Unlike the simple transition, there is no auto-reversed animation in the incoming slide. Each animation should define in the right direction.

Transition for backward navigation
If you have tested the above slide-up transition example, you may have noticed that is having a move to up also when slide navigation going to back has occurred.

It brings a wrong user interaction and is not intuitive. You should want to provide the animation for the correct direction when occurred backward navigation.
We are providing several solutions to deal with this.
--marp-transition-direction CSS variable
While playing transition, --marp-transition-direction CSS custom property (as known as CSS variables) will be available in @keyframes.
It provides 1 in forwarding navigation, or -1 in backward navigation. Using var(--marp-transition-direction) together with calc() function would be useful to calculate the position in response to the direction of slide navigation.
- @keyframes marp-outgoing-transition-slide-up {
- from { transform: translateY(0%); }
- to { transform: translateY(calc(var(--marp-transition-direction, 1) * -100%)); }
- }
- @keyframes marp-incoming-transition-slide-up {
- from { transform: translateY(calc(var(--marp-transition-direction, 1) * 100%)); }
- to { transform: translateY(0%); }
- }
And now, the slide-up custom transition is working completely in both directional navigation!

NOTE: Any other CSS variables defined in the context of animation keyframes cannot use in keyframes.
Set custom animations for backward transition
Alternatively, you also can set more animation keyframes that are specific for backward navigation.
Declare @keyframes with the backward- prefix to the custom transition name, just like as marp-transition-backward-xxxxxxxx. It is available in both simple keyframes declaration and split keyframes declaration.
- @keyframes marp-incoming-transition-triangle {
- /* Wipe effect from left top */
- from { clip-path: polygon(0% 0%, 0% 0%, 0% 0%); }
- to { clip-path: polygon(0% 0%, 200% 0%, 0% 200%); }
- }
- @keyframes marp-incoming-transition-backward-triangle {
- /* Wipe effect from right bottom */
- from { clip-path: polygon(100% 100%, 100% 100%, 100% 100%); }
- to { clip-path: polygon(-100% 100%, 100% -100%, 100% 100%); }
- }
In backward navigation, each layer will try to use the backward keyframes first, and fall back to the normal keyframes if not declared. To disable unintended fallback in backward animations, set an empty declaration of @keyframes.
- @keyframes marp-outgoing-transition-zoom-out {
- from { transform: scale(1); }
- to { transform: scale(0); }
- }
- @keyframes marp-incoming-transition-zoom-out {
- /* Send the incoming slide layer to back */
- from { z-index: -1; }
- to { z-index: -1; }
- }
- /* ⬇️ Declare empty keyframes to disable fallback ⬇️ */
- @keyframes marp-outgoing-transition-backward-zoom-out {}
- @keyframes marp-incoming-transition-backward-zoom-out {
- from { transform: scale(0); }
- to { transform: scale(1); }
- }
OK, I've described all about declarations for the custom transition!
Tips
Easing function
Each transition has a linear easing by default. You can specify animation-timing-function property within individual keyframes if you want.
Setting
animation-timing-function: step-end;to a keyframe can make paused animation until the next keyframe.
Duration
We have a fixed duration time of 0.5s as default for every transition. If you want to set a different default duration for your custom transition, please set --marp-transition-duration property in the first keyframe (from or 0%).
- @keyframes marp-incoming-transition-gate {
- from {
- /* Set the default duration of the "gate" transition as 1 second. */
- --marp-transition-duration: 1s;
- clip-path: inset(0 50%);
- }
- to { clip-path: inset(0); }
- }
- @keyframes marp-outgoing-transition-backward-gate {
- from {
- /* You also can set a different default for backward transition as necessary. */
- /* --marp-transition-duration: 1.5s; */
- clip-path: inset(0);
- }
- to { clip-path: inset(0 50%); }
- }
- @keyframes marp-incoming-transition-backward-gate {
- from { z-index: -1; }
- to { z-index: -1; }
- }
The slide author can override the default duration at any time, through the transition local directive in Markdown (<!-- transition: fade 2s -->).
Fixed property
If some of the properties required a fixed value while playing transition, try to set the same declaration into from (0%) and to (100%).
- @keyframes marp-outgoing-transition-pin {
- /* Use fixed transform-origin */
- from {
- transform-origin: top left;
- animation-timing-function: ease-in;
- }
- to {
- transform-origin: top left;
- transform: rotate(90deg);
- }
- }
- @keyframes marp-incoming-transition-pin {
- /* Send the incoming slide layer to back */
- from { z-index: -1; }
- to { z-index: -1; }
- }
Layer order
As presented in a diagram earlier, the incoming slide layer always will be stacked on the top of the outgoing slide layer. According to the kind of transition, this order may be not suitable.
A fixed property z-index: -1 is helpful to send the incoming slide layer to back.
A fixed
z-index: 1to the outgoing slide (send to front) is also getting the same result, but currently setting a positive number toz-indexmay bring animation jank in Chrome.
Change layer order during a transition
If you want to swap the order of layers during animation, try to animate z-index property.
- @keyframes marp-incoming-transition-swap {
- /* Incoming slide will swap from `back` to `front` at 50% of animation */
- from { z-index: -1; }
- to { z-index: 0; }
- /* Declarations for moving animation */
- 0% { transform: translateX(0); }
- 50% { transform: translateX(50%); }
- 100% { transform: translateX(0); }
- }
- @keyframes marp-outgoing-transition-swap {
- 0% { transform: translateX(0); }
- 50% { transform: translateX(-50%); }
- 100% { transform: translateX(0); }
- }
z-index is always taking an integer value, and interpolated z-index value by animation does not take any decimal points too. So animating from z-index: -1 to z-index: 0 is exactly meaning to set -1 at the first half of duration and 0 at the last half, except if using a non-linear easing function.
Frequently used properties in transition
There are a lot of animatable CSS properties, and the following properties are frequently animated in built-in transitions.
opacitytransformfilterclip-pathmask-image(-webkit-mask-image)box-shadowz-index
Try it!
Transitions for Marp CLI's bespoke template backed by View Transitions API in the browser, provides flexibility to design your talk as you like. Custom transition brings out your boundless creativity, without complex JS codings, just declarative definitions in CSS.
We are really looking forward to what creative transition effects our community will create!
Share the custom transition you've made with Marp community. You can provide custom theme CSS including a bunch of custom transitions too.
